Friday, February 27, 2015

Beet- Corn Cutlet

Ready to Serve Beet - Corn Cutlet.
Corn - Beet Cutlets are one of the good snack. Corn is available plenty in the market these days. This snack is easy to prepare and healthy too. We can have them for evening snack.
Very little spices are used and very little oil is used for shallow frying. Beet root, carrot and corn is used with bread slices and a bowl of  thick Beaten rice. (Awalakki in Kannada Language). Beaten rice is known as Awal or Poha also. 
Let us see some benefits of having corn and Beetroot in our diet.
Corn is contain carbohydrates, protein and fats. It also has moderate amount of fiber, potassium and Vitamin A and Vitamin B.
Beetroot is help to lower the blood pressure and reduces the bad cholesterol. They contain large amount of soluble fibers and act as powerful anti oxidants. Beetroot is full of minerla silica and it helps the body to use calcium efficiently. Calcium makes up our bones and teeth strong. They contain a lot of Iron and it helps to treat anemia. It also helps to ease the constipation problem and good for brain power.
Here is a recipe of the yummy snack which is very easy to prepare with the ingredients which we already have in our kitchen. Hot and spicy cutlets not only tasteful it is one of the healthy food I can say if  oil usage is less.
No onions or garlic is used in this recipe and the whole family can enjoy having them with chutney or ketch up.
I have prepared 3 varieties of Beet -Corn Cutlets . The dough is the same. I have dipped the dough in Chiroti Rava (Small size Semolina) and prepared a few. As for healthy aspect I just fried the dough on the dosa pan using very little oil like tikky. One more variety is that I have put  the tikky in curd and sprinkled some chat masala. All these 3 varieties are tasty and yummy. Go ahead and prepare Beet-Corn Cutlet and the whole family can enjoy I am sure.

Things needed:

 Beet Root : 3
Carrot : 1
Corn : 1 Cup
Beaten Rice (Awalakki or Poha) : 1 Cup
Green Chilly : 2
Garam Masala : 1/2 Tea spoon
Brown Bread (Wheat bread) : 4 to 6 slices.
Ginger : an inch ( 1 Table spoon)
Jeera : 1 Tea spoon
Oil : 1/2 Cup
Chirote Rava (small size semolina) : 2 to 3 Table spoons.
Cashew nuts : 2 Table spoons. 
Salt : Required :

Method :

1. Wash and remove the outer skin of beetroot and carrot.(scrape out) and ginger. Grate carrot, beet root and ginger and keep it aside.


 2. Cut green chilly, coriander leaves and grate ginger. Boil corn cob and remove the corn and keep it aside.
3. Wash  Awalakki, remove the water completely and keep it aside. Powder the bread slices.
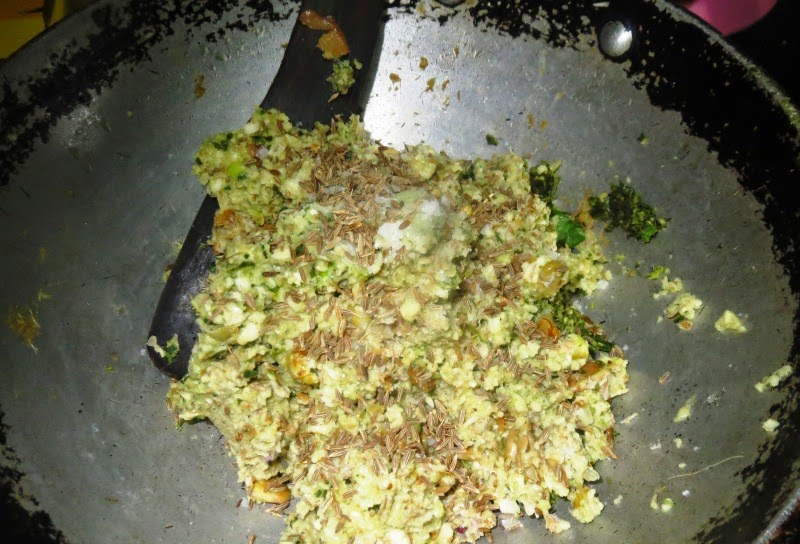
 4, Keep a pan on the fire, put  2 tea spoons of oil and heat. Add jeera, fry for 10 seconds. Add cashew nuts and fry for 10 seconds.


 5. Add beet - carrot -ginger gratings and mix it nicely. Fry till they turn soft. (1 to 2 minutes).
6. Add turmeric powder,garam masala and salt. Add Awalakki (poha) and bread powder. Mix it nicely.

7. Add cut coriander leaves and stir for 1 more minute. Put off the  gas and let it cool. Add boiled corn to it and mix it well.
8. Kneed the ready dough nicely and divide into small portion.
9. Now keep a pan on the fire and heat. Put a spoon of oil.
10. Take a small portion of dough give a desired shape to it.
11. Dip in chiroti rava (both sides) and place this cutlet dough on hot tava. Put 1/2 tea spoon of hot oil.
 12. Cook on medium heat. Turn the other side and cook until it turn slightly brown. (not burnt).


13.Simply you can try out this way too. ( with out dipping in rava)
Take a portion of Cutlet dough. Give a desired shape. Place it on tava . Add little oil.(sprinkle).

14. Cook on both sides till they turn brown. Place them on serving plate and serve.

 15. Serve with Ketch up or any chutney you prepared.


16. You  can also serve Beet - Corn Cutlet with curd.
17. Place a cutlet on the plate. Put curd and  2 table spoons of boiled corn.
18.Sprinkle chat masala on the top and serve.


Note :

Do not add any water while frying the vegetables. You can use bread crumbs instead of  Rava. You can add more vegetables with beet root. Using more spice and more oil is optional. Using onions and garlic is also optional.I have substituted Awalakki (beaten rice) for potatoes. Dipping the cutlet dough in Rava or bread crumbs will absorb more oil and is not good for health.
Time : 30 to 40 minutes.
Servings : 4 to 5.

Wednesday, February 25, 2015

Seeme Badane Kai Curd Curry (Chayote Squash )

Ready to Serve Seeme Badane Kai Curd Curry
Seeme Badane kai (Kannada) is called Chayote Squash in English. You get this vegetable all around the year. We in Karnataka do prepare so many food items with this vegetable.  I had this  Seeme Badane Kai Curd Curry in my brother in law's daughter's house. This curry goes well with plain rice. Just checked the spices she used. She has used soaked channa dal, jeera, mustard seeds. Green chilly, ginger and coconut. We people from Udupi do not add soaked channa dal and mustard seeds while grinding. We do add a spoon of soaked raw rice. This rice helps to thicken the curry and also gives a good binding. Soaked channa dal helps the curry to be thick.
Chayote Squash is also known as Chow -Chow. It it Seeme Badane Kai ( Kannada), Bangalore Katharikai or Seemai Katharikai in Tamil, Seema badanekaya in Telugu, Sheema Katharika in Malayalam.
Lets see some benefits of eating Chayote Squash in our diet. 
Seeme Badane Kai is very low in calories and it does not contain saturated fats and cholesterol. It is very rich source of dietary fiber, anti - oxidants, minerals and vitamins. It has a good source of B- Complex, Vitamins. It has minerals like iron, manganese, phosphorus, zinc, copper and potassium.
Seeme Badne Kai Curd Curry goes well with plain rice, any masala rice ( like puliyogare or bisi bele bath or any bath), chapatis, pooris and even dosa or idly. This is an easy recipe even the beginner can try this curry and enjoy.
This curry do not contain any onion or garlic. You can prepare on any special days or even festival or feast.

Things Needed :

Chayote squash : 2
Coconut : 1 Small cup (Fresh or dried - I have used little dried coconut).
Jeera (Cumin Seeds) : 1/2 Tea spoon
Channa Dal : 1 Table spoon
Pepper Pods : 2 to 3
Mustard seeds : 1 Tea spoon
Salt : required
Turmeric powder : a pinch
Oil : 1 Tea spoon (I have used coconut oil).
Ingh : a pinch
Curry leaves : 5 to 6
Curd : 1 Cup
Green chilly : 2

Method : 

1. Wash and soak Channa dal for 20 to 30 minutes.
2. Wash and remove the outer skin of Seeme badane Kai (Chayote Squash) and cut it into small.
3. Cook cut chayote squash pieces till soft (use half cup of water and medium flame). and keep it aside.
4. Grate coconut and grind it along with soaked channa dal, 1/2 a spoon of mustard seeds, 1/2 spoon of jeera , washed and cut ginger, pepper pods and green chilly. Remove from the mixi jar and keep it aside.
5. Keep a pan on the fire and put cooked chayote squash pieces, salt and turmeric powder. Let it cook for 2 minutes.
6. Add ground mixture and mix it well. Let it boil nicely for 2 to 3 minutes. Add water if required(mix it well while boiling).
7. Keep a small pan on the fire and add oil. Add mustard seeds and urid dal (1/2 Tea spoon). Let the mustard seeds splutter.
8. Add curry leaves and ingh and put off the gas.
9. Add this fried mustard mixture to the cooked curry and add curd and mix it nicely and shift the curry to a serving bowl.
10.  Add cut coriander leaves and serve Seeme Badane Kai Curry  with any main dish you prepared.

Note : 

Do not add more water while cooking Chayote Squash. You can more chilly if you wish too. Adding onions to the curry is purely optional. (I have not added). You can prepare this curry with other vegetables also. Instead of curd you can use a marble size tamarind. ( I have used curd). Do not add curd to a hot curry. It may turn savoury and curdled. Add it once the curry cools a bit.(Warm).
Time : 20 minutes
Serves : 3 to 4 .

Sunday, February 22, 2015

Avarekai Vada - Palav

Ready to Serve Avarekai Vada Palav
Avarekai is nothing but Field Beans and it is a seasonal crop. It grows plenty in Karnataka during winter months like November to February normally. People do prepare lots of food items using Avarekai. Avarekai is used almost every day in their cooking. It is dried in the sun and used as substitute to Toor Dal also.
Lets see some benefits of Avarekai or Field Beans.
They are good source of Vitamin A, B and C. These Vitamins help our body strong and healthy and protect against diseases. They alos make our body and teeth strong. They improve the immune system. It is also good for people who are suffering from diabetic. They help to normal the blood sugar level and gives energy. They are highly nutritious.They lower the cholesterol level. Field Beans are rich in fiber content and helps in proper functioning of our digestive system. They are rich in minerals like Iron, Manganese, Magnesium, Phosphorous, Copper and Potassium.
Avarekai Vada is easy to prepare and can be eaten as snack or along with lunch or dinner. Or it can be munched any time of the day.
Here I have just mixed Avarekai Vada with simple and plain Palav. It taste very nice with any masala rice. Just dipping them in Hot Palav turns the vada soft and adds taste to Palav.
Lets see the recipes now.

1. Avarekai Vada

Things Needed :

Avarekai (Field or Flat beans) :  2 Cups
Ginger : 1 Table spoon (an inch)
Green Chilly : 2
Pepper Pods : 6 to 8
Jeera :  1 Tea spoon
Curry Leaves : One Handful  (10 to 12)
Coriander Leaves :  2 to 3 Table spoons.
Salt : required .
Coconut : 2 Table spoons
Oil : 1 Cup

Method :

!. Remove the pods and soak it in water for 10 minutes.
2. Wash green chilly, coriander leaves, curry leaves and ginger. Remove the outer skin of ginger and grate it.
3. Now grind green chilly, ginger, pepper pods, coriander leaves and curry leaves with out water for 10 seconds.
4. Add field beans and grind it coarsely  (Do not grind them into paste) with little by little water. (only required water).
5. Remove from the Mixi jar and put it in a bowl. Add salt, jeera, grated coconut and mix it nicely and keep it aside.
6. Keep oil on the fire and heat. Take a small portion of the ground avarekai dough in hand.
7. Pat it on your palm and put it in hot oil and fry on medium heat. Fry on both side and remove from the oil.
8. Put them on kitchen towel so that extra oil is absorbed by the kitchen towel.
9. Serve them with any chutney or ketchup with a cup of coffee or tea.

Note : 

You can use channa dal instead of Avarekai. ( Field Beans ). You can add cut onions and garlic to the batter just before you start frying vadas. Adding coconut is optional. Do not add more water while grinding. You can add some besan (channa flour) if the dough turns watery. It may not taste the same.
Time : 30 Minutes
Serves : 4 to 5.

2. Avarekai Vada - Palav :

Things Needed : 

Carrots : 2
Beans  :  1/4 Kig
Basmati Rice : 2 Cups
Avare Kai Vada : 8 to 10
Butter or Ghee : 2 Table spoons
Oil : 2 Table spoons
Green chilly : 2
Garam Masala : 1 Tea spoon
Coconut : 1 Cup
Cloves : 3 to 4
Ginger : 1/2 inch
Cinnamon : 2 small pieces
Salt : required
Pepper pods.
Jeera (cumin seeds) : 1/2 Tea spoon
Cardamom : 2
Cashew Nuts : 1 Handful

Method : 

1. Wash and  keep basmati rice for 10 minutes. (Remove the water from rice completely).

2. Wash carrot and beans and cut it in to small. Grate coconut and ginger and keep it aside.
3. Wash green chilly and coriander leaves and cut into small. Keep it aside. Crush pepper pods and keep it aside.
4. Keep a pan on the fire and put oil and ghee. Add cinnamon, cloves, jeera, cardamom and crushed pepper pods. Add cashew nuts.
5. Fry them nicely for 10 seconds and add carrots, beans and fry for 1 to 2 minutes. Add grated ginger and chilly.
6. Add basmati rice and mix all the ingredients nicely for 3 to 4 minutes. Put off the gas and then add garam masala.
7. Mix it again and put this mixture in the rice cooker or pressure cooker. Add required water.  ( I cup rice = 2 cups water).
8. Add coconut and salt. Mix all the ingredients nicely and cover it and cook. ( Rice cooker will be off once the palav is done).
9. Once the palav is done just open and arrange the vadas in circle and cover with little palav. ( Keep the rice cooker switch off).
10. Let the vadas be in the rice cooker along with Palav for 10 to 20 minutes. Now shift the Palv with Averekai Vada to a serving dish.
11. Serve Palav + Avarekai Vada with any raitha .
12. It goes well with any chutney too.

Note :

If you are using pressure cooker it should not be more than 8 to 10 minutes. (cooking time). Then put off and wait the pressure to be down. Remove the lid and then arrange and insert vadas in Palav and close the lids and leave it for 10 minutes and then serve the Palav.
Adding more spices is optional. Adding coconut is also optional. ( I have added). Adding more oil or ghee or butte is optional. You can use onions and garlic. ( Add it while frying). You can use any variety of rice to prepare Palav..Use water according to the requirement.
Preparation and cooking time : 40 minutes.
Serves : 4 to 5. 

Jack fruits Seeds Tikki

Jack fruits are healthy Seasonal fruits. The seeds also contain lots of good vitamins and minerals.  After eating the fruit we throw away th...

About

author
My name is Nalini Somayaji. Teaching is my profession. Cooking is my passion. Reading, travelling, visiting new places, having fun with kids are some of the hobbies I can say. My recipes are Healthy, quick, easy and simple. Grown up being a traditional family member I love and respect Indian culture and traditions. Love classical dance and music.
Learn More →